
Invites are mostly used for Invite only platforms. New members need an invite link to register to the platform. An invite email contains a unique link that directs the member to the registration page. This link can only be used once. There are a few ways to send invitations:
- Send an invite based on email address.
- Send an invite based on an invite code.
- Import members from a CSV file.
You can enable or disable users to change their time zone during registration that is different than the one set in the platform invite. You can do this by following the steps below:
- Go to Participants at the top menu in Admin.
- Underneath Users, choose User Management at the left menu then click Settings on the right.
- There are multiple options that can be determined for your participants when registering on the platform.

As a Moderator, you will usually send invites based on a list of email addresses. If you do not need to import any member information (i.e. if you will collect everything you need to know in the platform), then this is the simplest way to go. If you want to send many invites at once or if you want to import profile fields along with the invites, you may choose to import your members from a CSV file.
To create and send an invite based on email address(es), go to the admin section of your platform and follow the steps below:
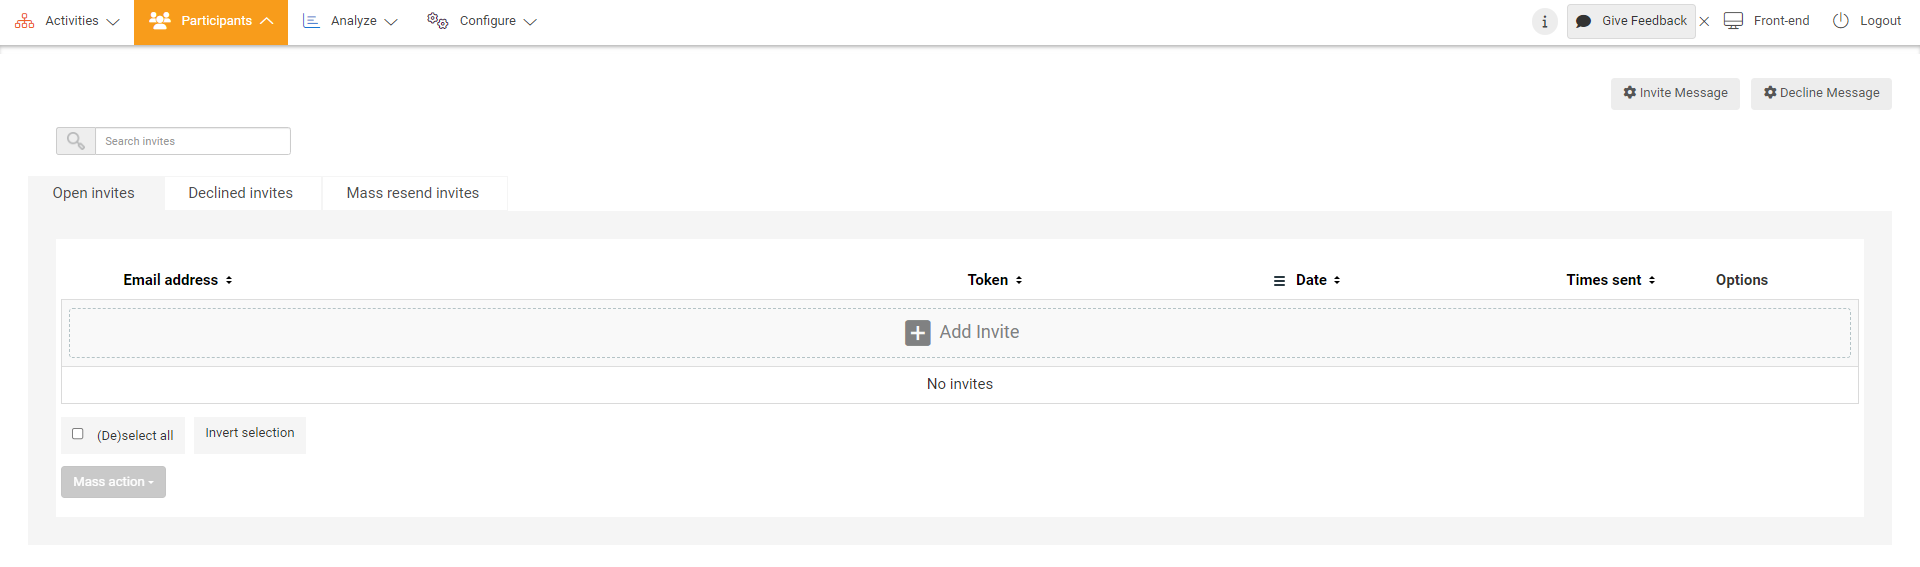
- Go to Participants at the top menu in Admin.
- Choose Users – Invites at the left menu.
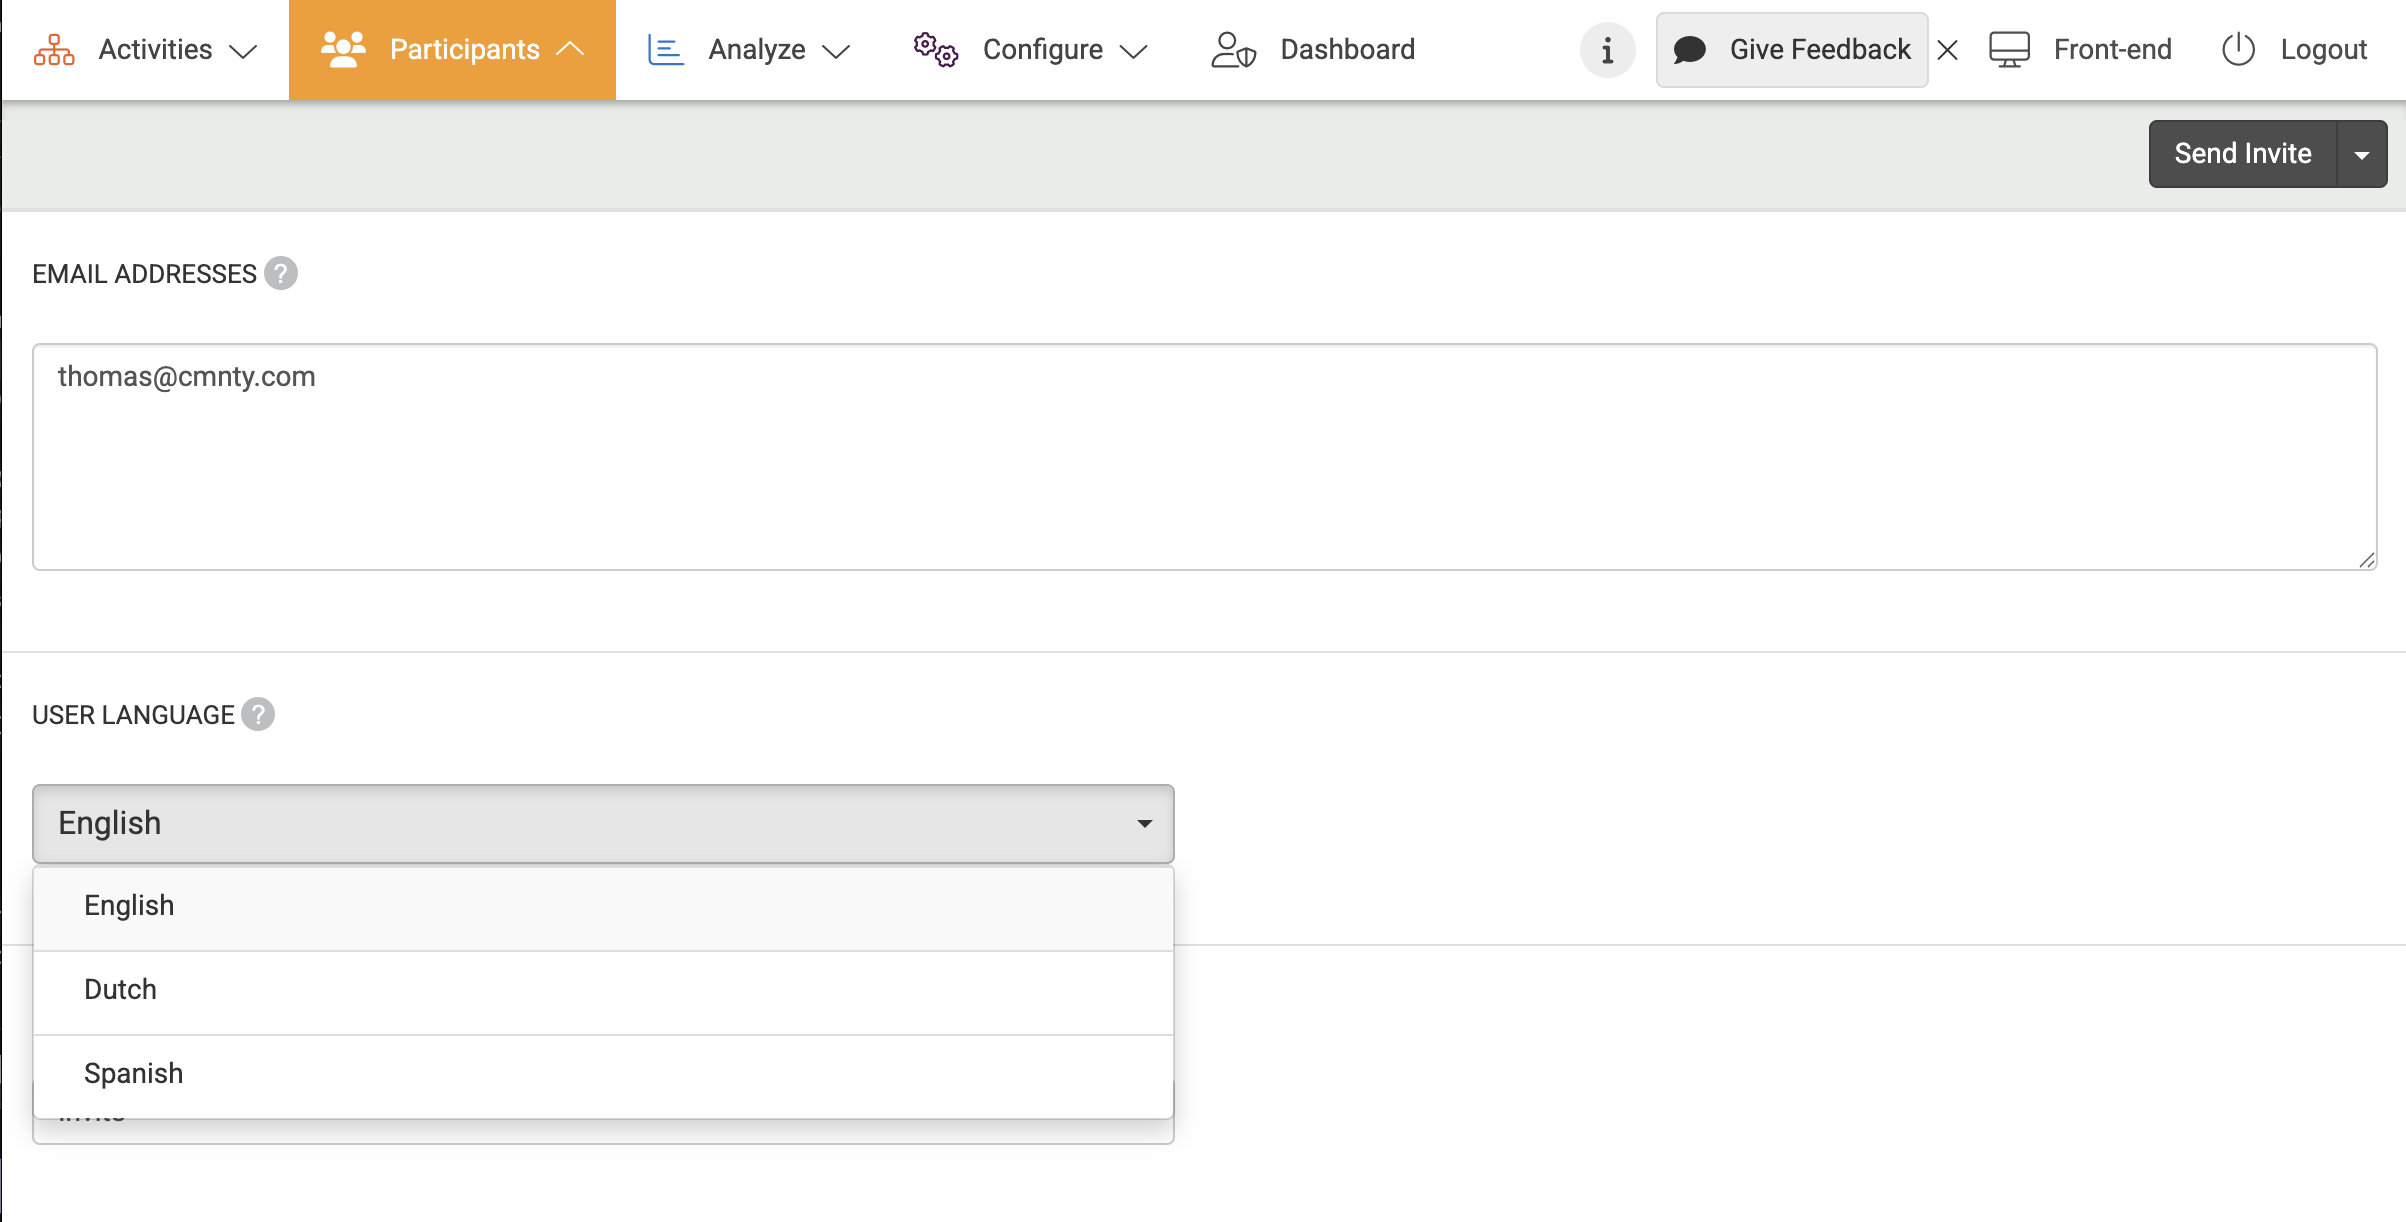
- Click Add Invite in the overview. You can fill in the email address or email addresses (separated by commas) of the participant(s) you want to invite to your platform.
- Add multiple email addresses to the invite by separating the email addresses with commas.
- Choose a default language for your invite.
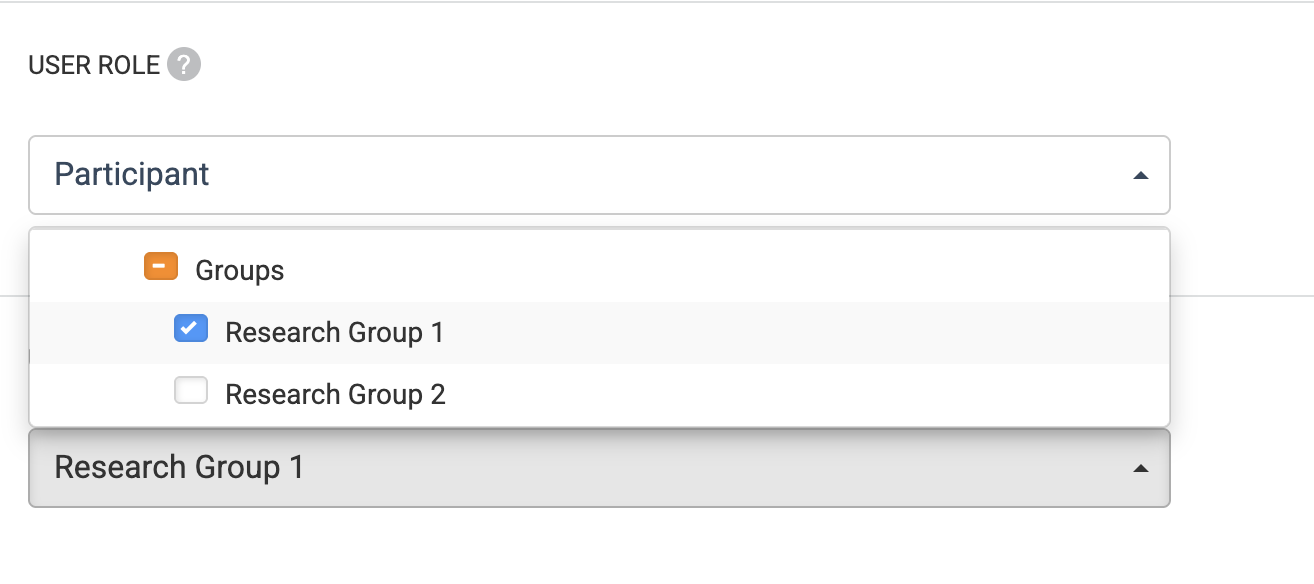
- Choose which User Role your invited users will get.
- When you have created User Groups, you can categorize your invited users.
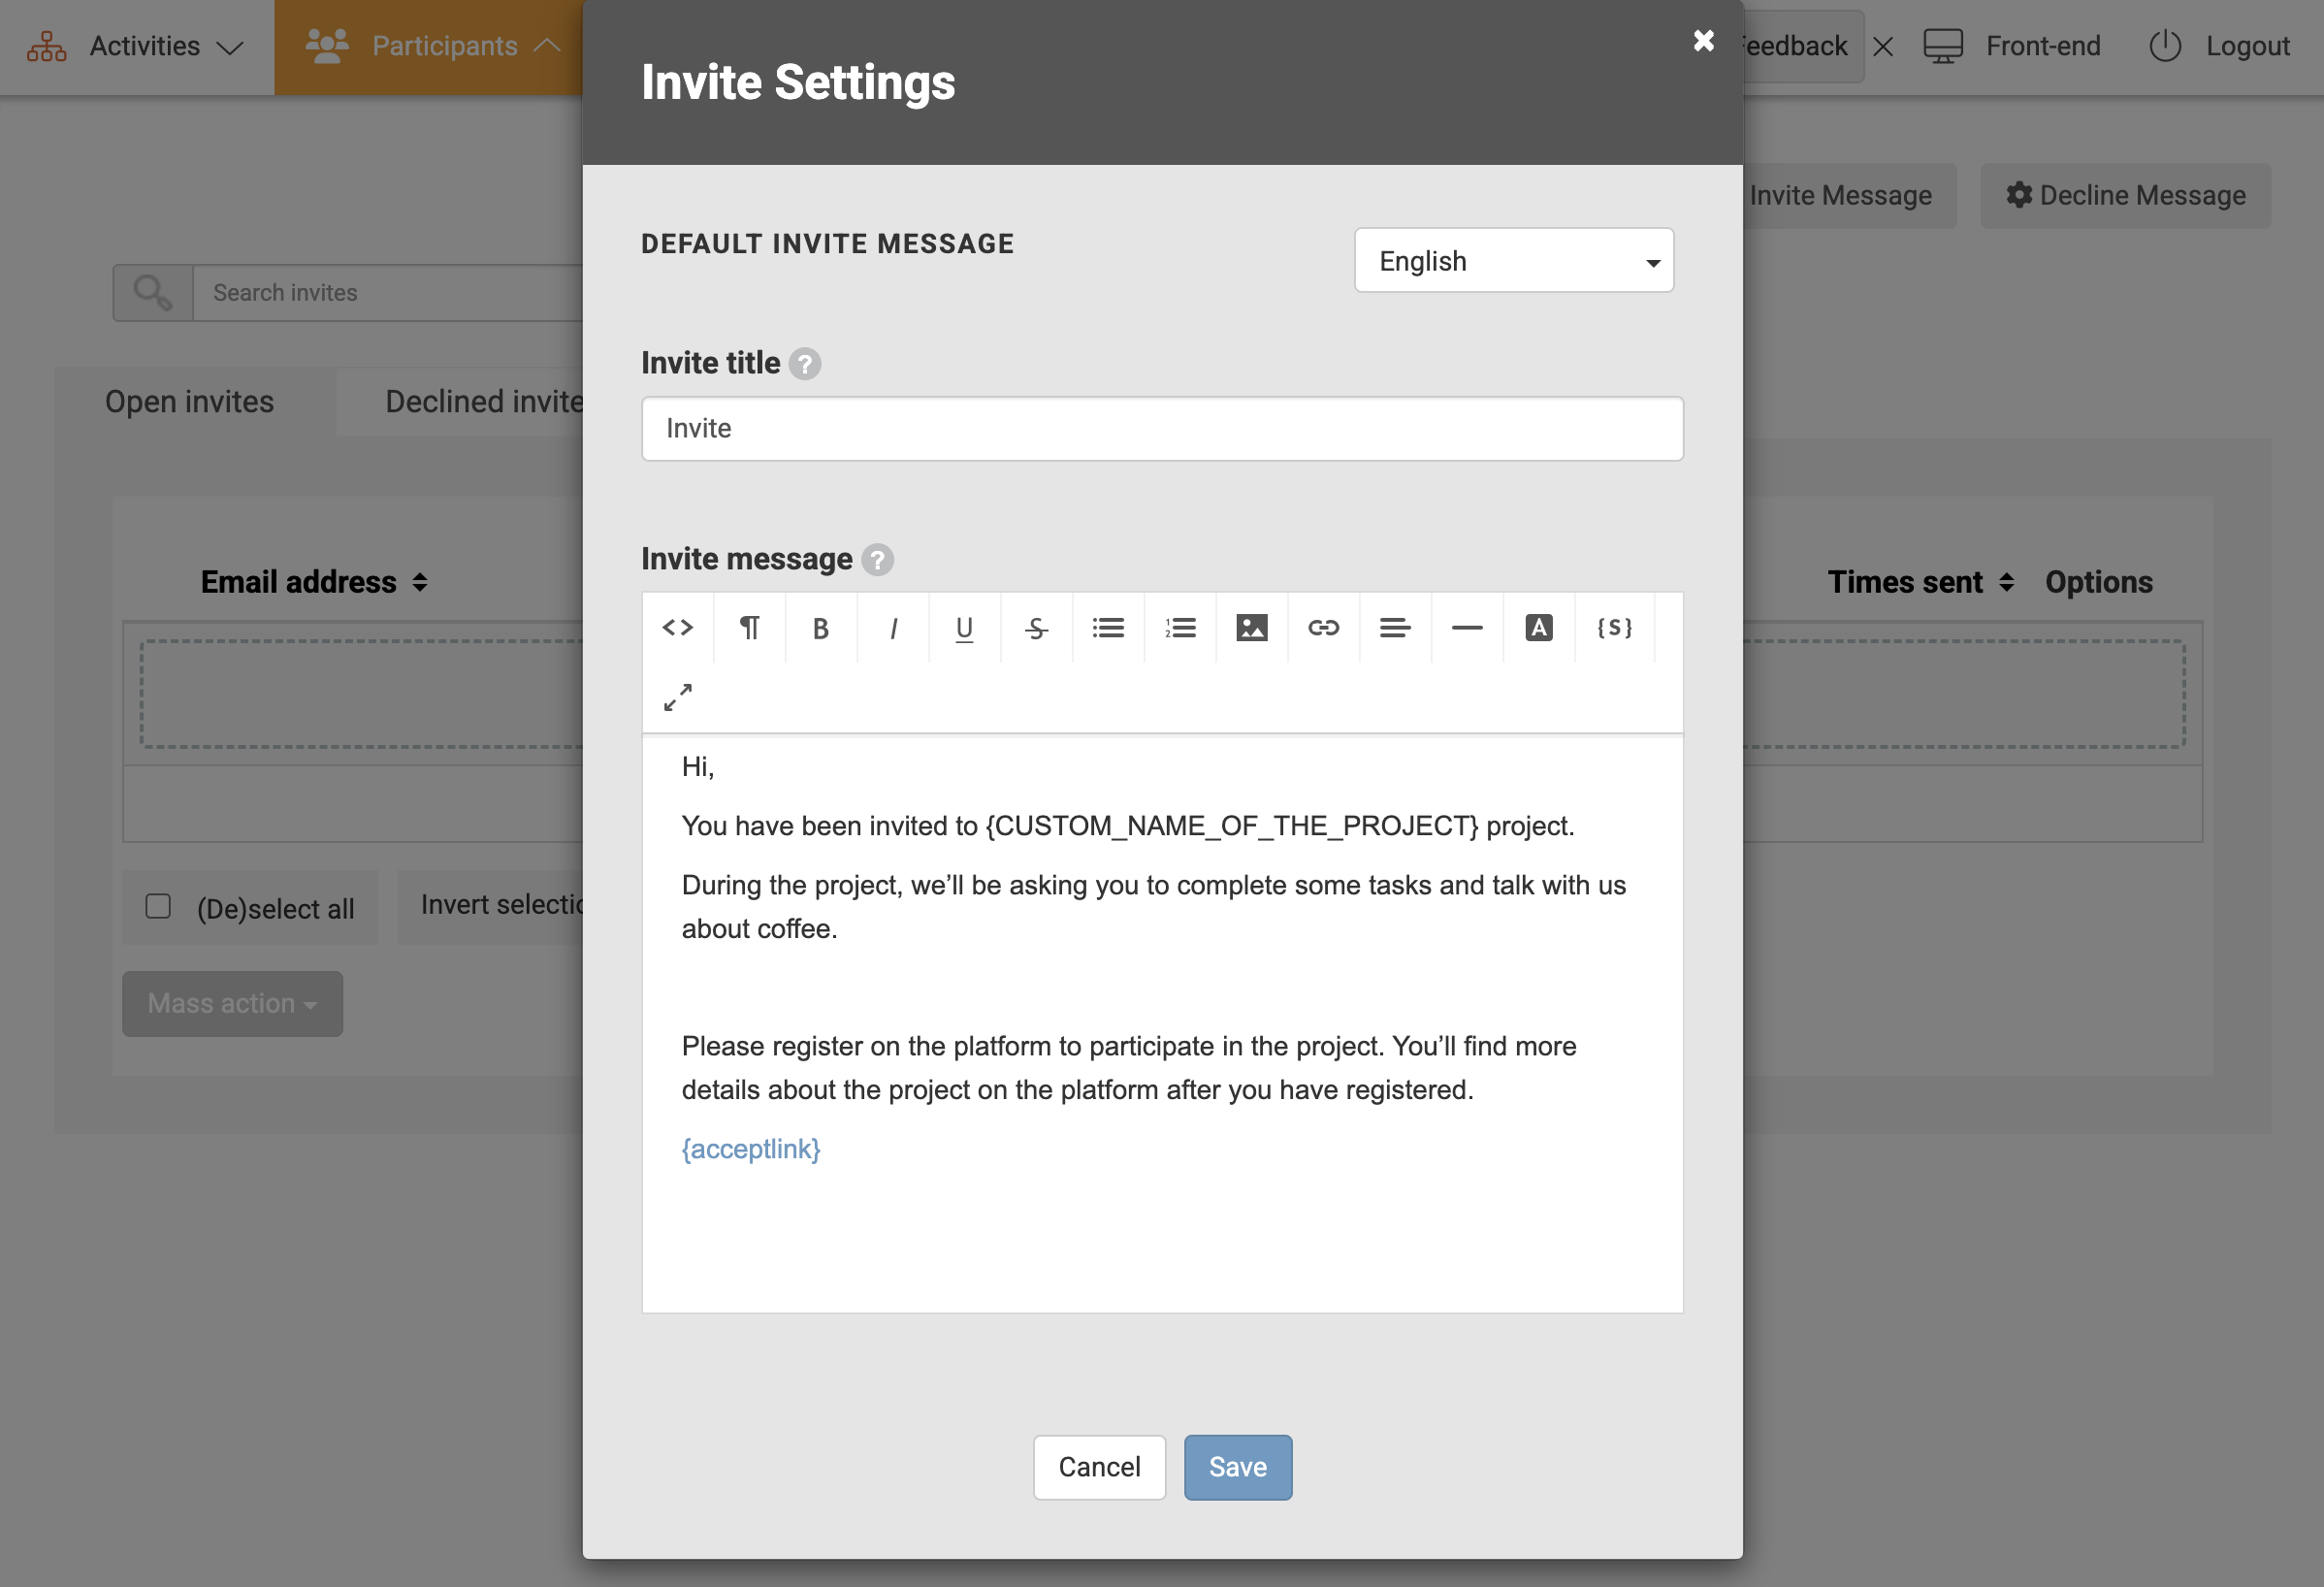
Default invite message
The text of your invite message will contain default message from:
- Go to Participants at the top menu in Admin.
- Choose Users – Invites at the left menu.
- Click on top right button for the Invite message.
You can change the invite message for this invite, but we strongly recommend not changing or copy-paste the accept and decline links, since the link might break and the participants won’t be able to sign up. You can choose a language and update that as well. You can also include a Decline Message if you would like for the participants rejecting to join the research.

Converting to invites vs. Sending invites
You can either convert data to invites or send invites immediately. The difference between the two lies in the moment of sending. If you choose to convert data invites, you will find all of the automatically generated invites with unique registration links per user displayed by following the steps below:
- Go to Participants at the top menu in Admin.
- Choose Users at the left menu.
- Choose Recruitment.
If you choose to convert data to invites, you will find all of the automatically generated invites with unique registration links per user displayed by following these steps:
- Go to Participants at the top menu in Admin.
- Choose Users at the left menu.
- Click Invites. You can now see that all of them are displayed as sent zero times.
You decide when you want to send these invites and whether you want to adjust or edit them beforehand. If you choose to send invites immediately, you will see that all of these invites will be sent with the same invite text and under the same role immediately after you hit the Send button.
The invites will then be displayed at the Invites page as already sent one time.