
You can import members from a CSV file. You may want to do this when you have a list containing email addresses and additional profile information (i.e. first and last names, pre-screening preferences, etc.). You can upload your CSV file by following the steps below:
- Go to Participants at the top menu in Admin.
- Choose Users – Import at the left menu.
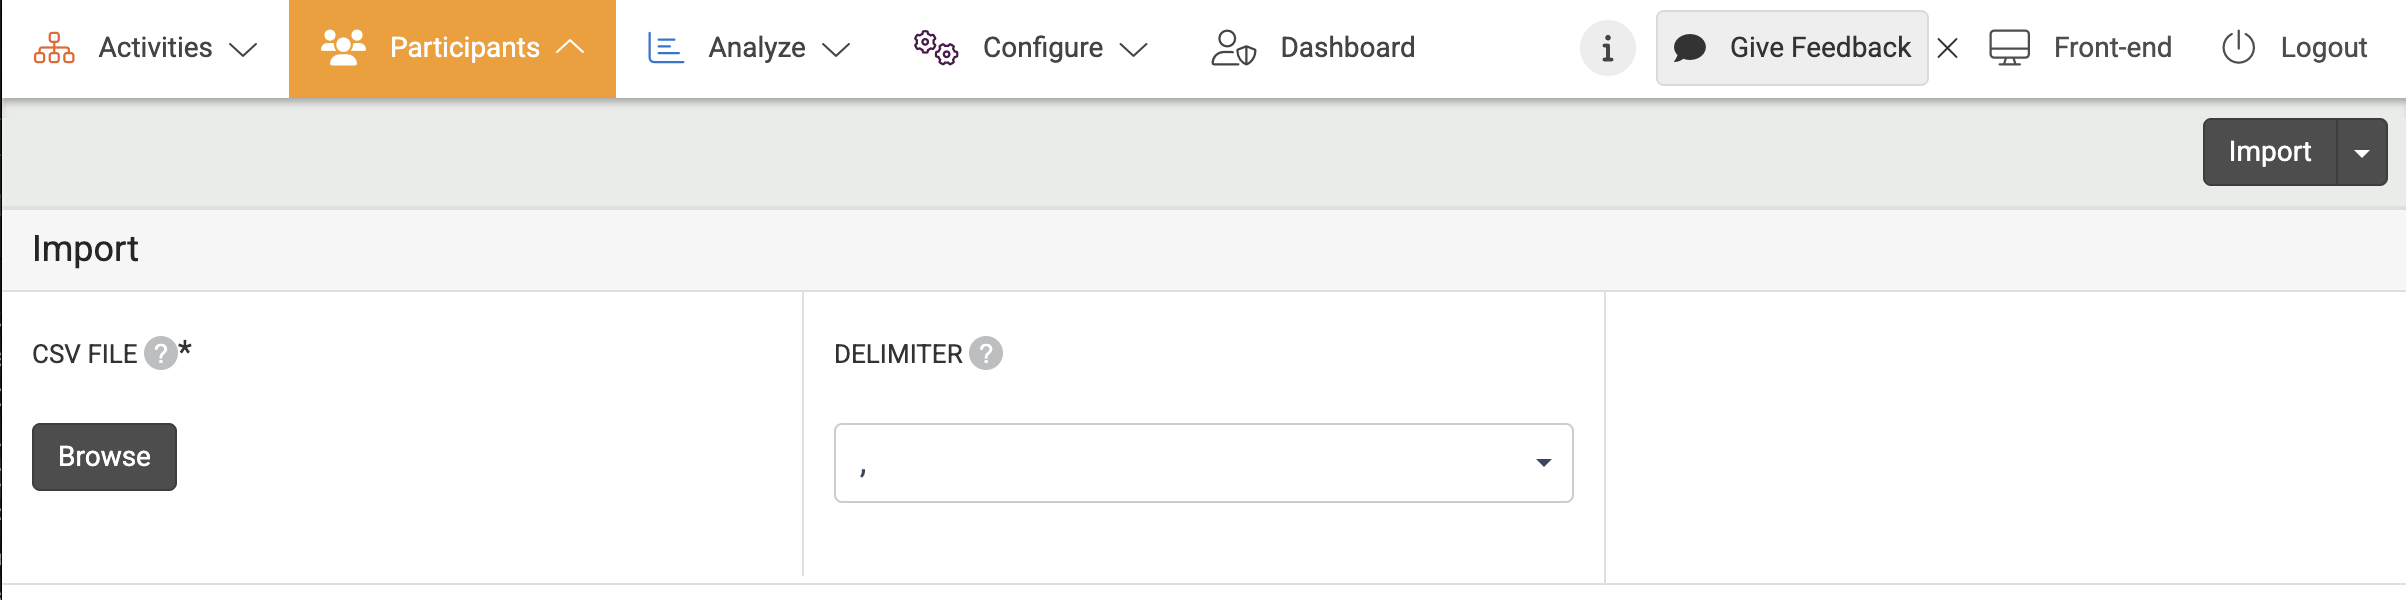
- Upload your CSV file by clicking Browse.
Please keep in mind that you can only import 1000 rows and 60 columns at a time. - Click Import at the right corner and map the data onto pre-existing profile fields. (Either an email address or invite token is required to ensure that all of your invites are unique).
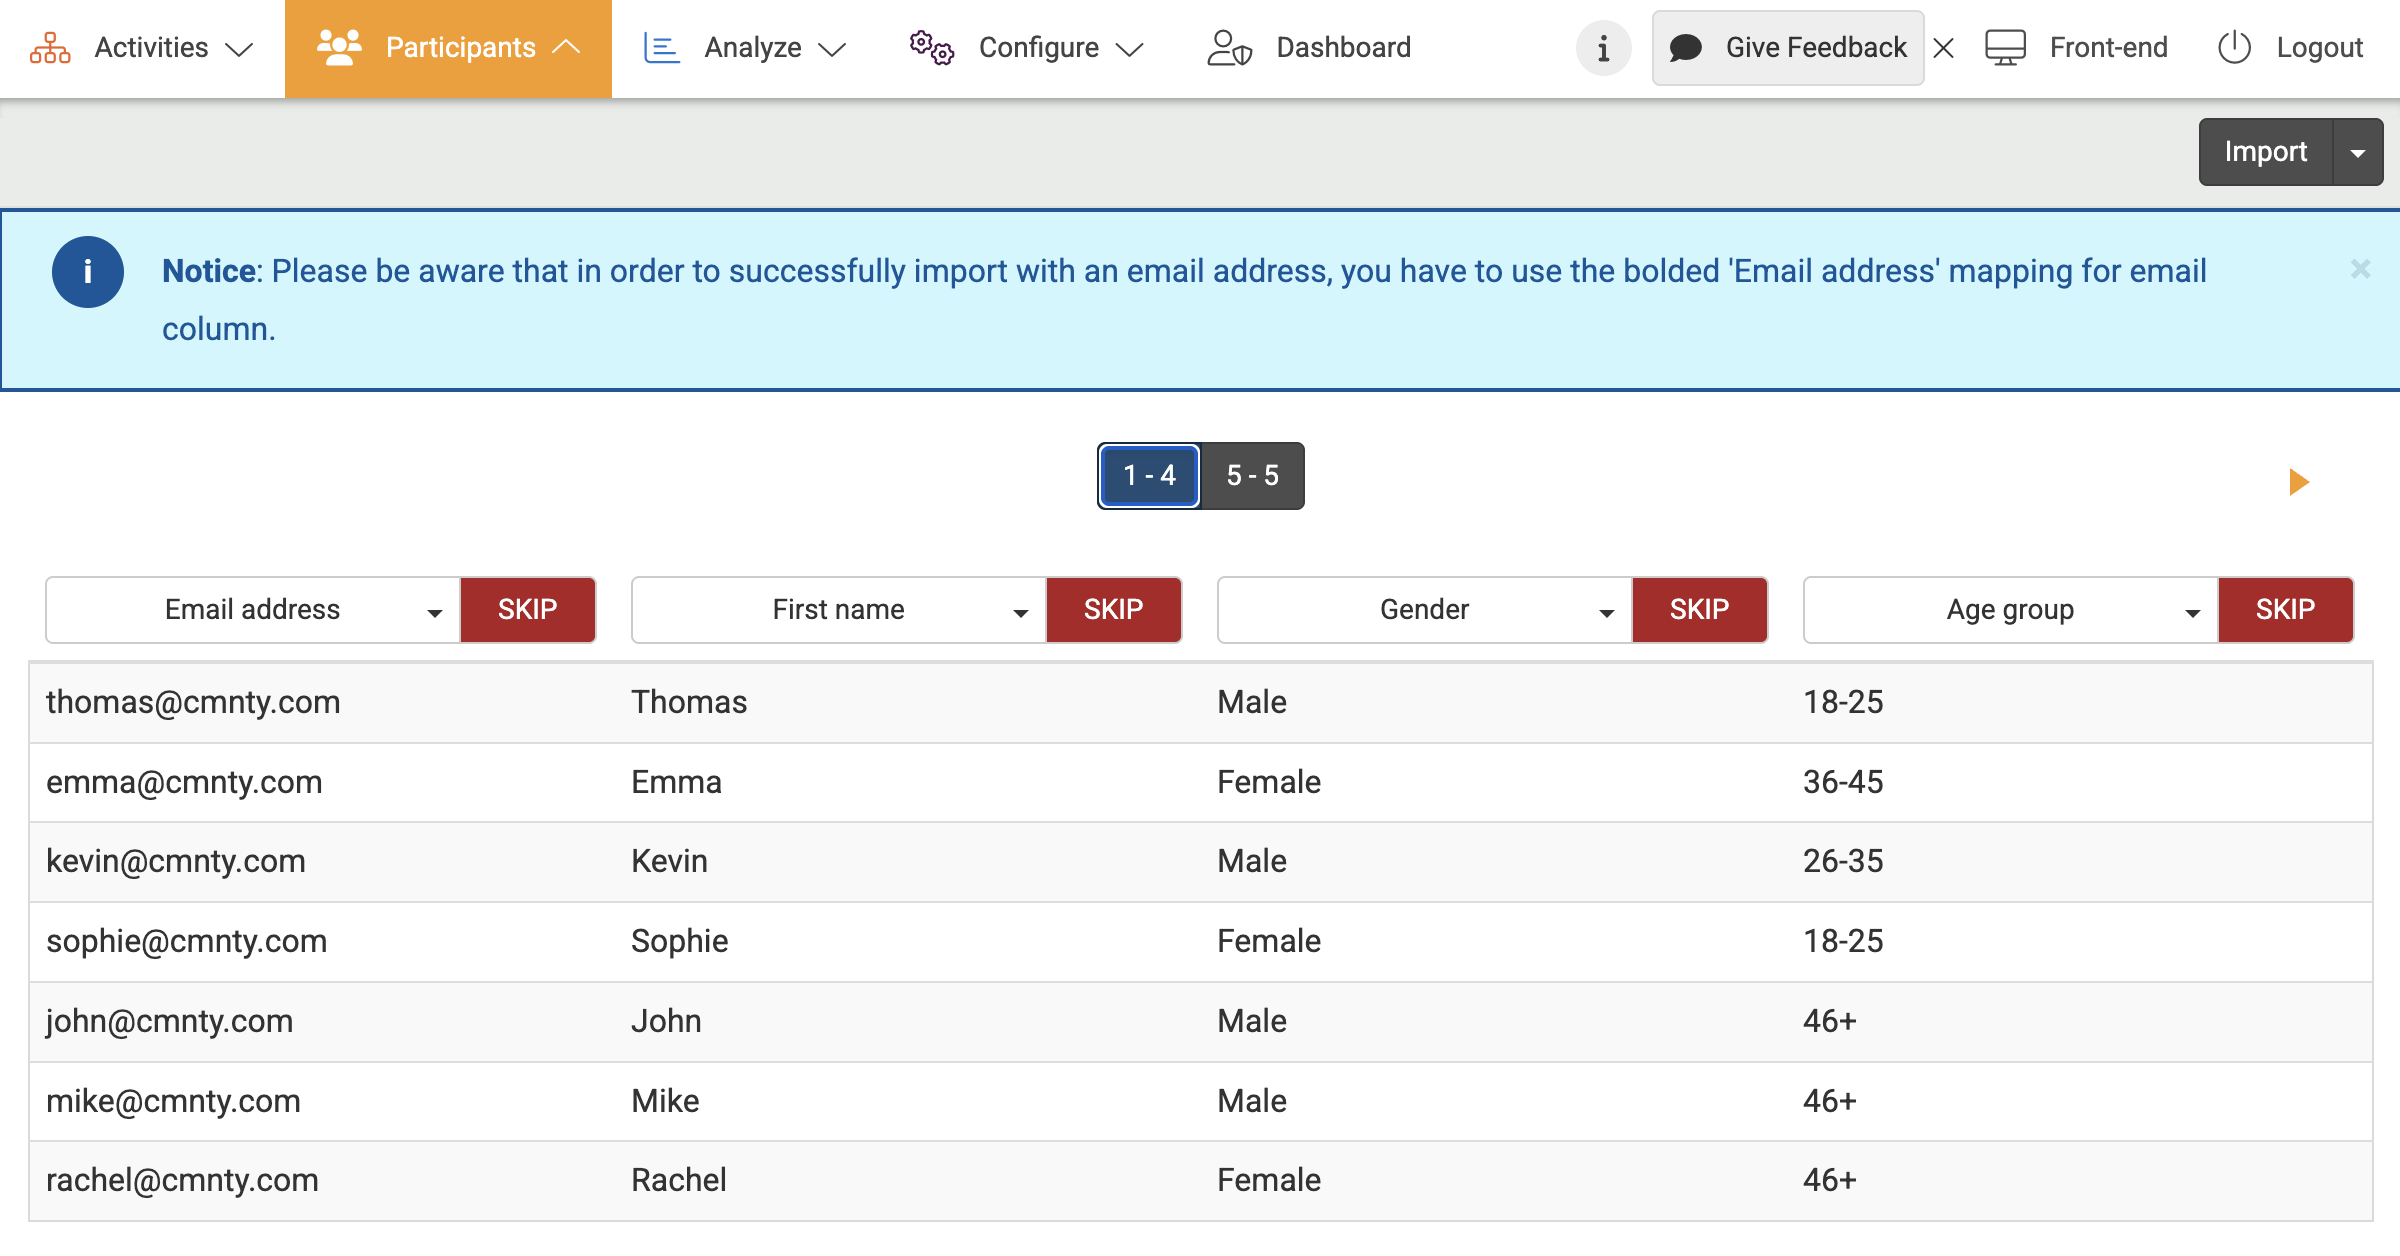
- After you have clicked import, you will see the first ten rows of your imported data. You can assign each column to a Profile field. You can easily add more profile fields by following the steps in this article.
- You also have the option to Skip each column.
When you’re importing a CSV file, make sure your file is converted to a UTF-8 document and you keep the delimiter on default comma. If you run into any issues uploading or configuring your CSV, please contact support.
Imported data will be shown in the recruitment overview which you can find here:
- Go to Participants at the top menu in Admin.
- Underneath Users, choose Recruitment at the left menu. From here, you can prepare and send the invites.
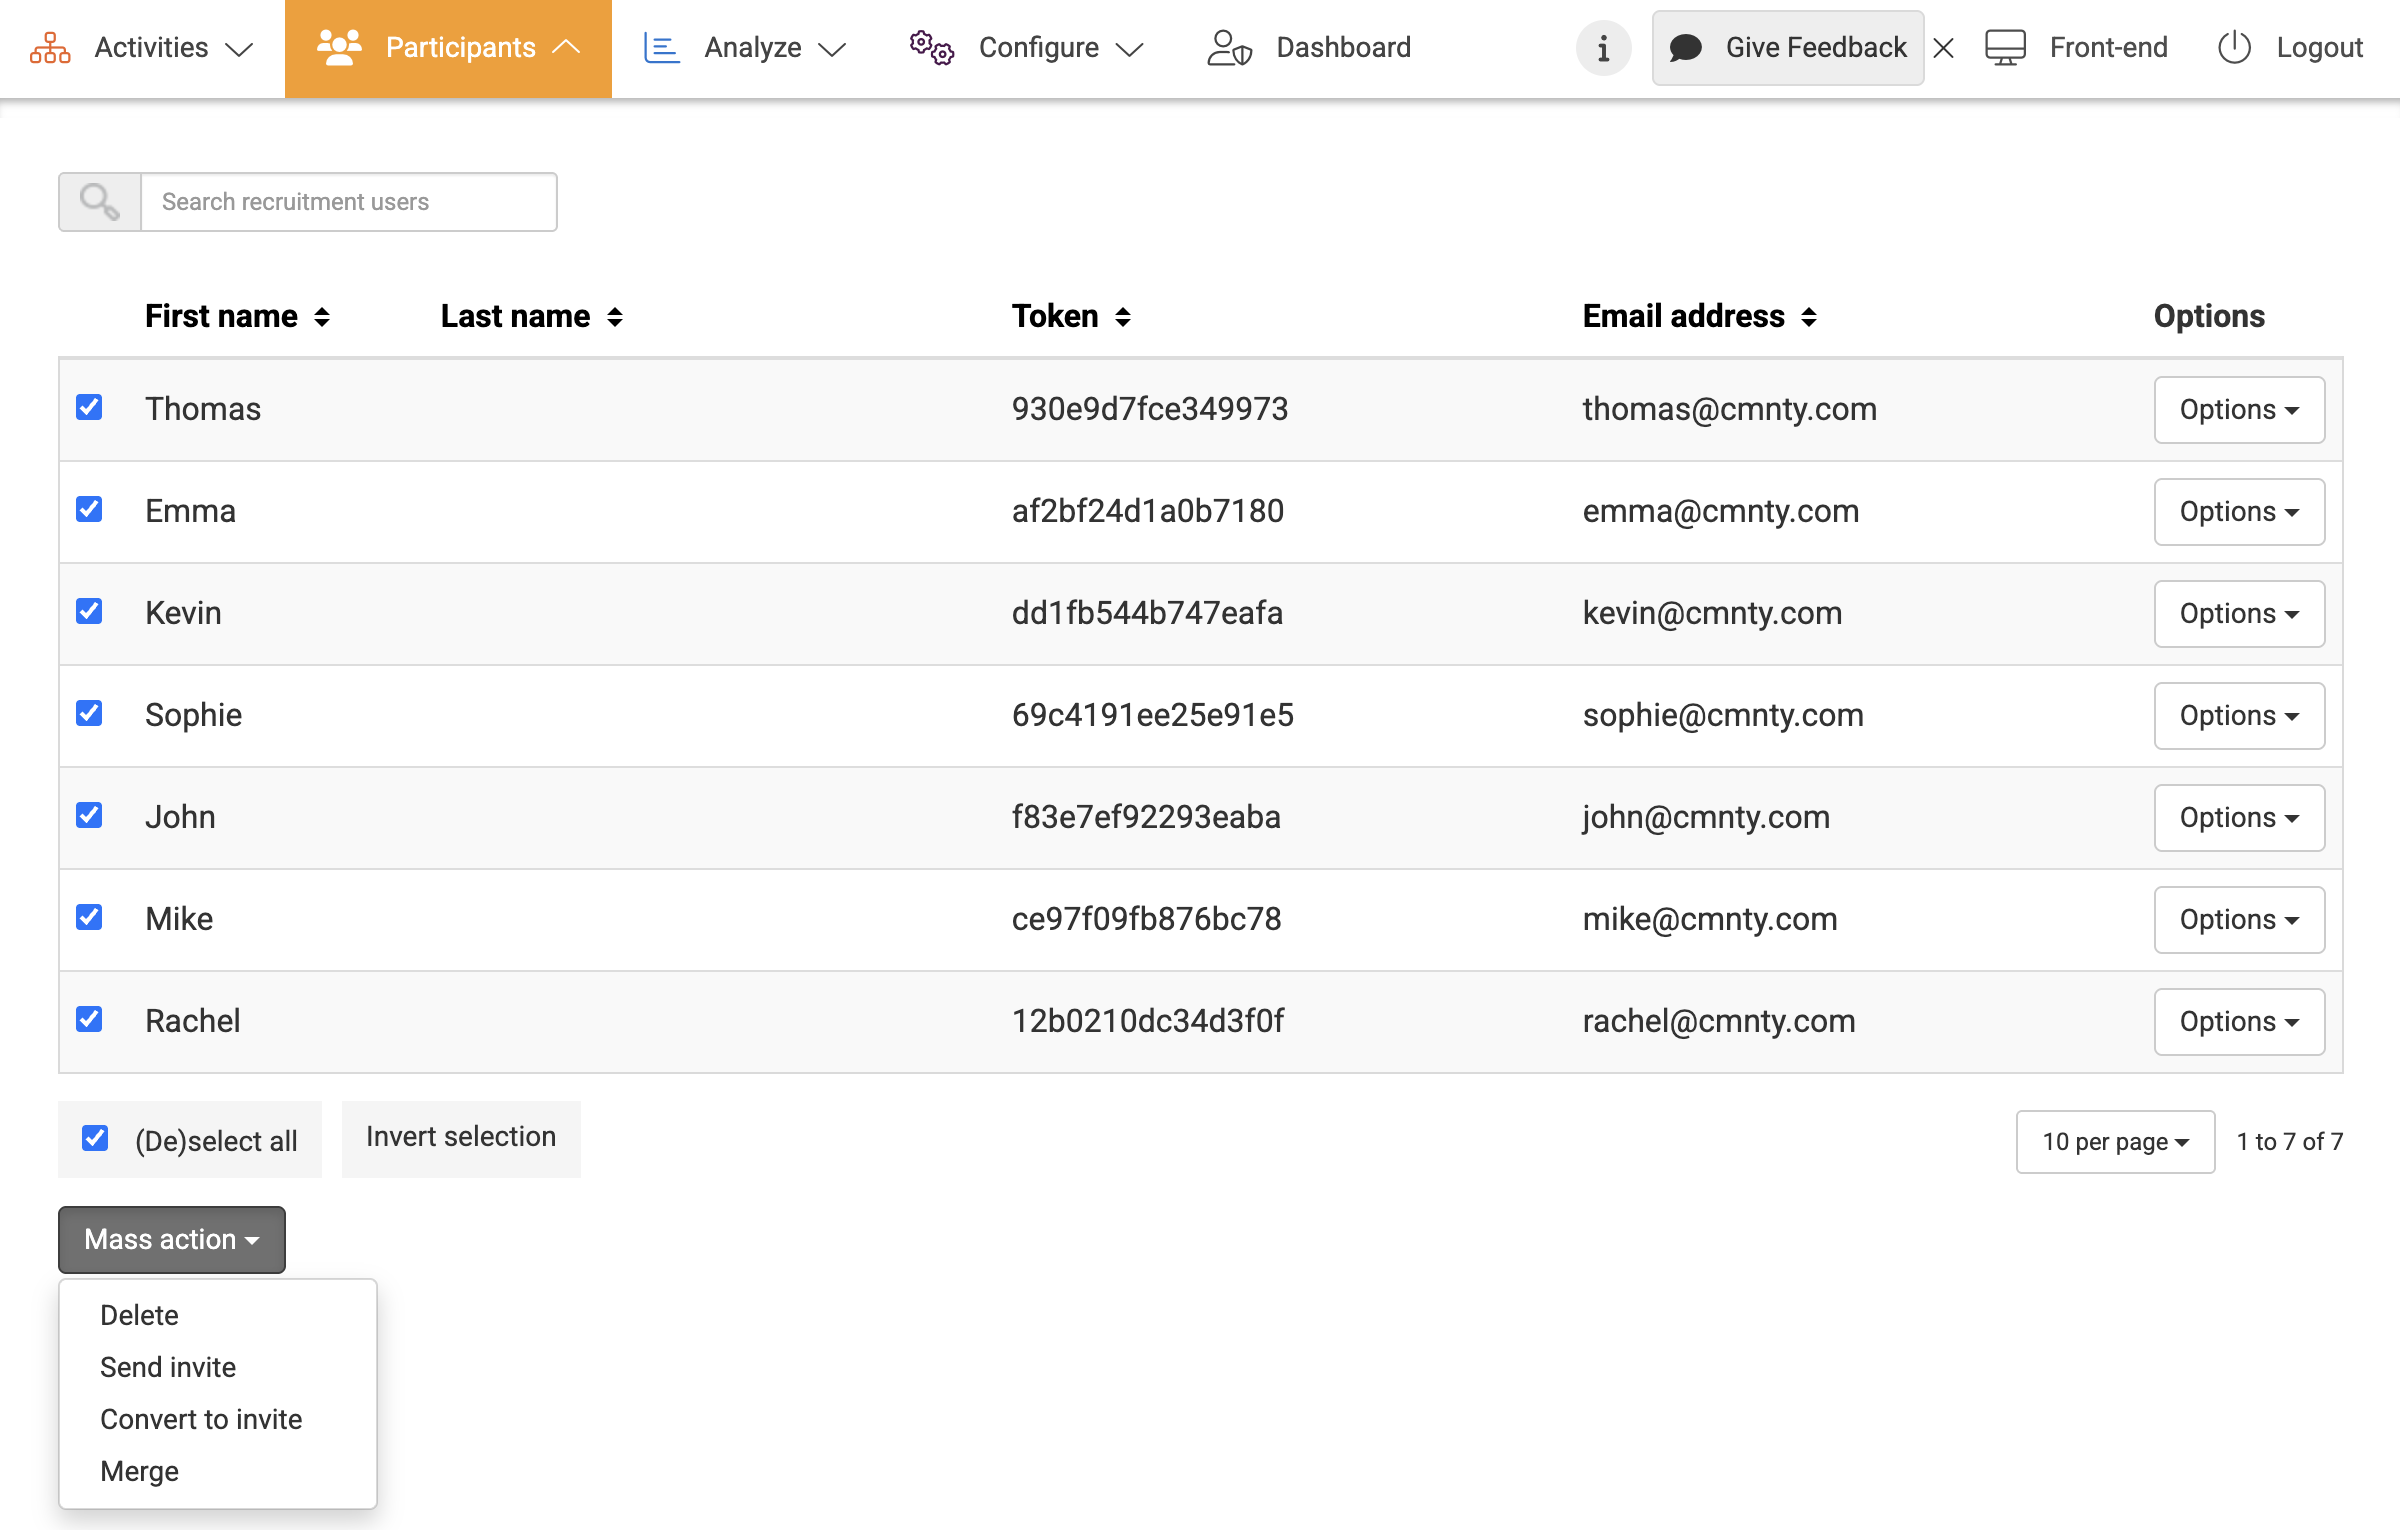
- On the Recruitment page, select the invites that you want to prepare.
- With the Mass Action button, you can choose to send the invite immediately or convert the invite. This means that the invite will be prepared in the Invites overview but is not sent out yet.
You can also use the Import function to merge data with an already existing user.
Read our blog post about absolute do’s for managing your online community.