
With SSO (Single Sign-On), you can login to multiple systems with the same login credentials. You can now use SSO with your community platform. Your members can enter a single username and password once and get secure access across different applications including your community. For example, CMNTY Platform and your webshop.
SAML-based SSO is now available on all plans as an add-on.
CMNTY Platform can only act as a service provider to another system (the identity provider). To set this up, you have to configure your identity provider and CMNTY platform correctly.
Support and configuration
CMNTY Platform supports the SAML 2.0 specification and can only act as a service provider. We support both the identity provider initiated flow and the service provider initiated flow. This means that when you are logging in, you can go from the identity provider to the service provider (CMNTY Platform) and the other way around. We support both Single Sign-On and Single Log-Out.
It is possible to use your existing user base within the platform next to your SAML user base. You are capable of configuring so both login methods work. We call this shared login and can be turned on or off.
If you want to use the SAML user base within a CMNTY Platform the platform will always be updated. If you add a new member to your SAML user base in a later stage, the user will be added to CMNTY Platform automatically right after the very first login in the SAML user base.
When you delete one of your staff members from your own database, the person will still be in the community but is not able to login anymore. This means that the data will be saved in the community but they can’t participate in or access the community anymore.
Setting up SAML SSO in Admin
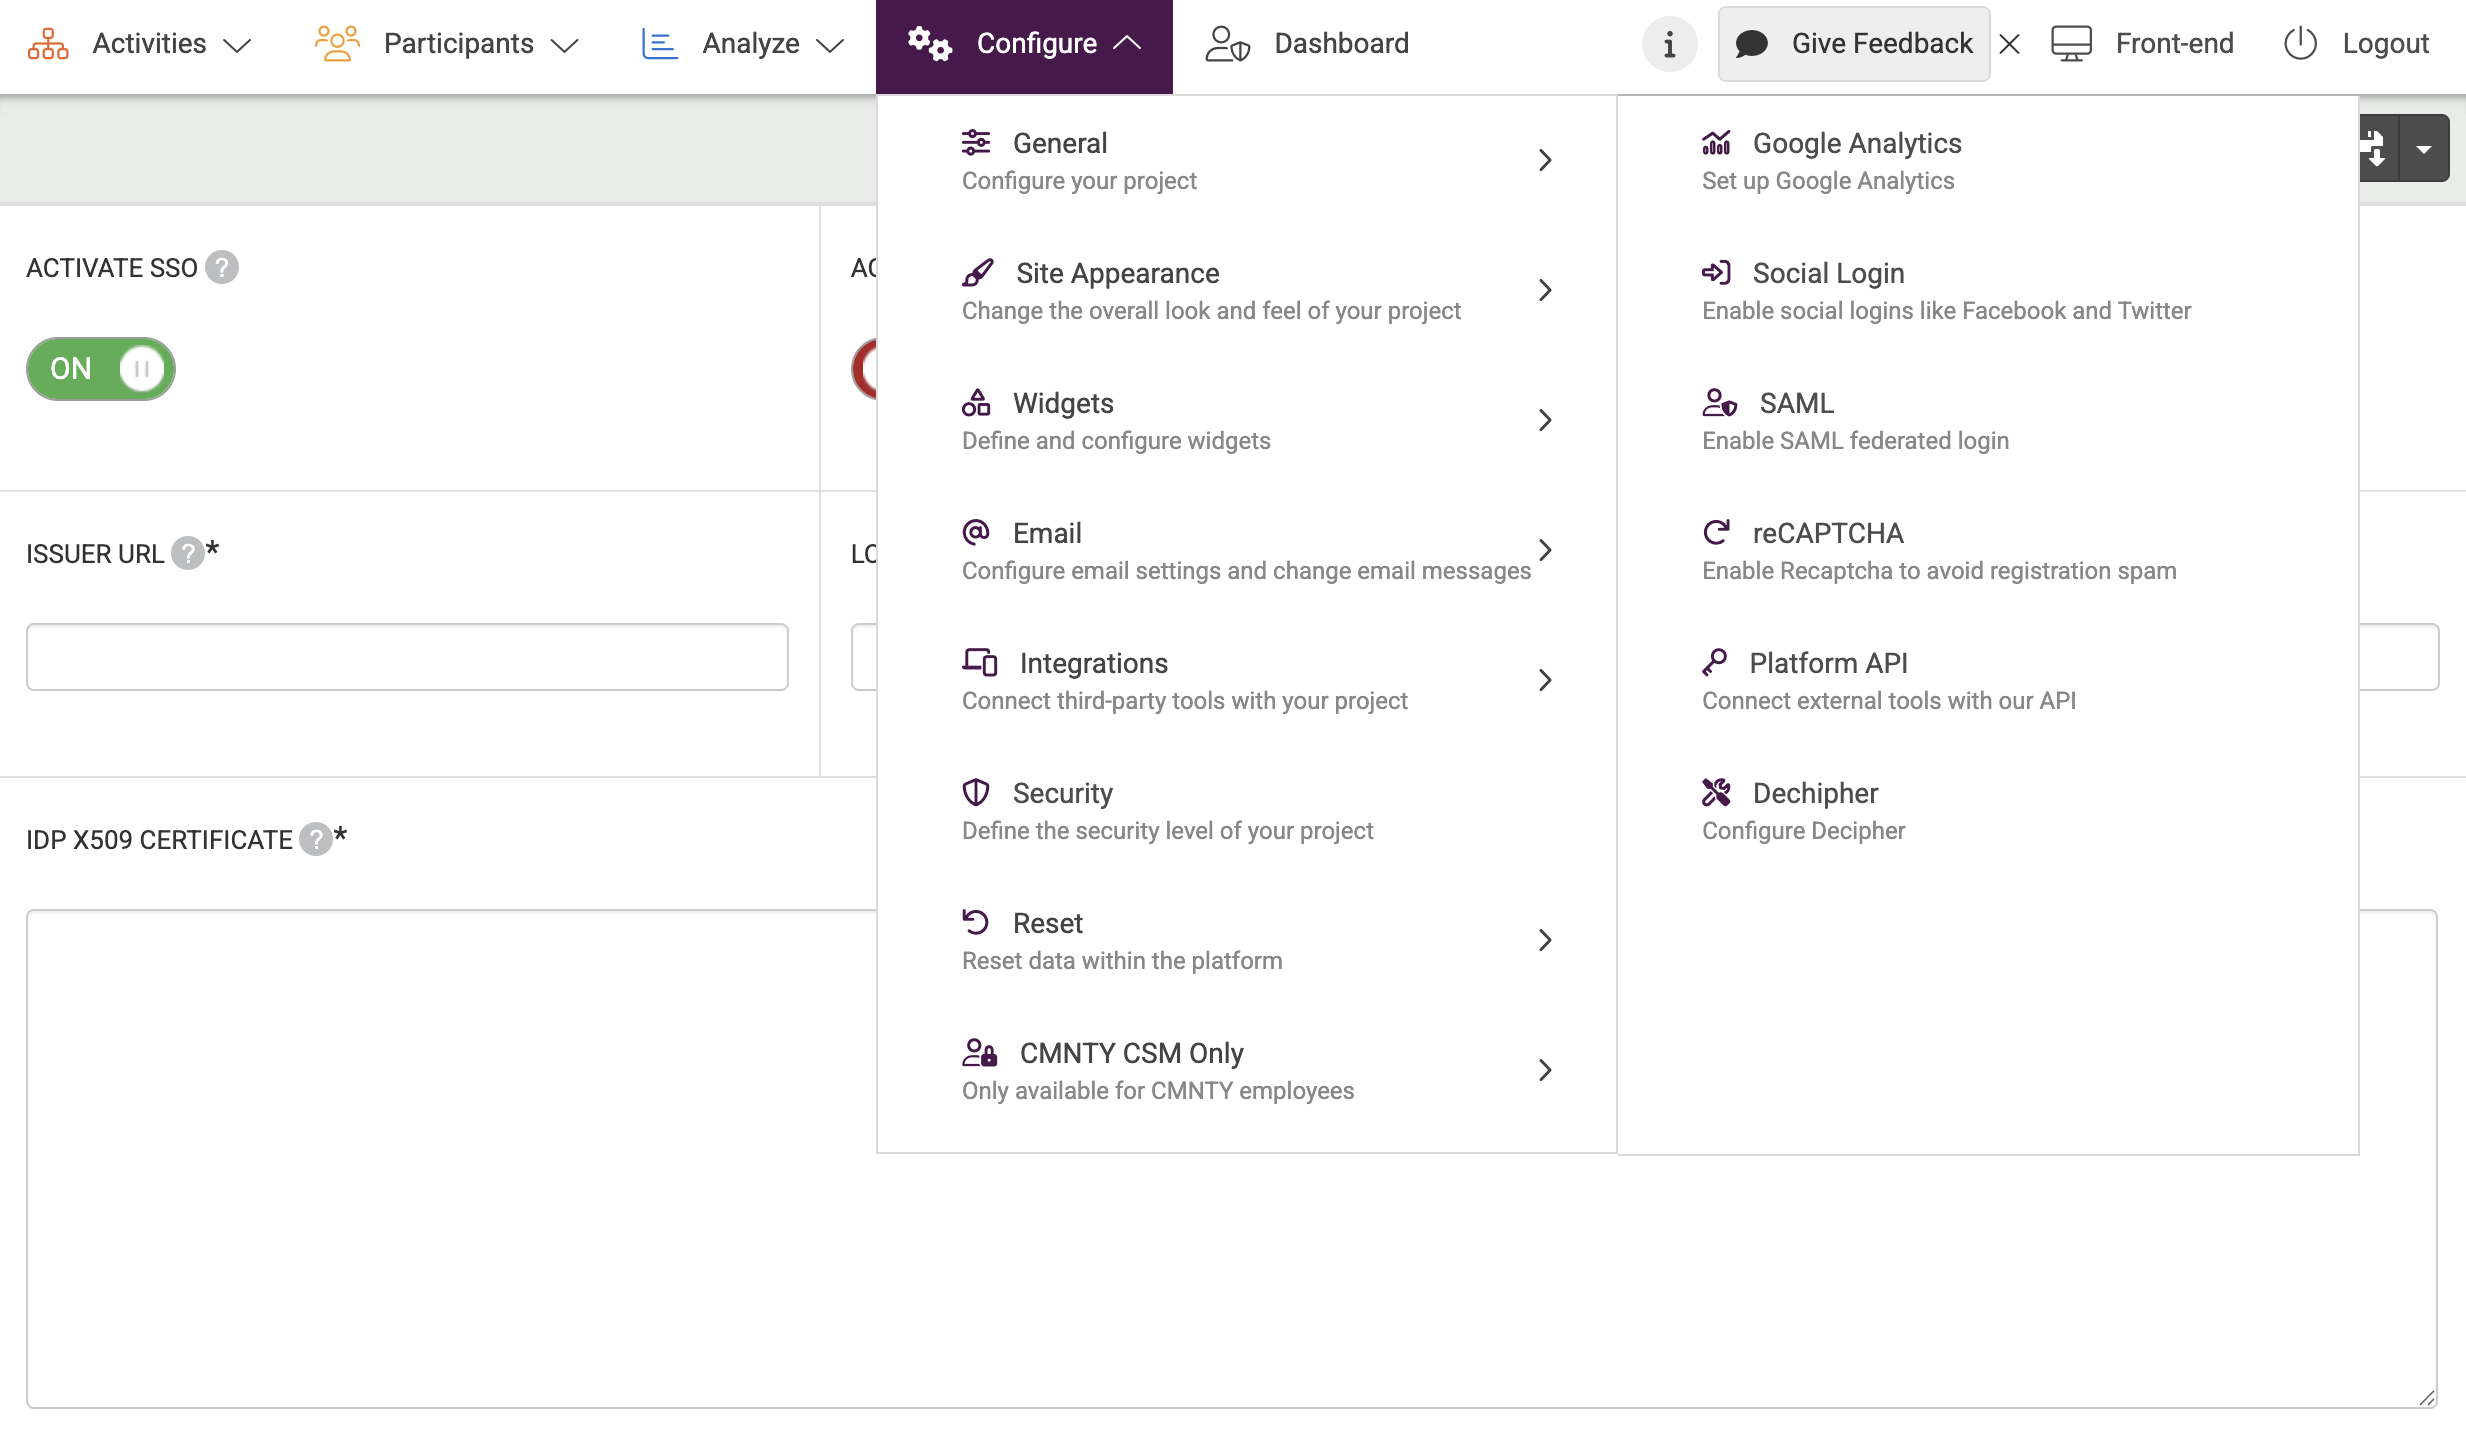
- Within CMNTY Platform you can enable SAML Single Sign-On in Admin > Configure.
- Choose Integrations > SAML.
- After activating SSO (Single Sign-On), you are required to fill in an Issuer URL, Login Endpoint and X509 Certificate.
 The Logout Endpoint is not a mandatory field. If you want to enable Single Log-Out and if your identity provider supports this, you should complete this field. The data for these input fields can be obtained from your identity provider.
If you activate shared login, you will be capable of logging in through the SAML-based identity provider and through the CMNTY Platform login page. Do note, however, that you are not capable of logging in with a SAML user on the Platform login page or log in with SAML on a platform account.
For testing purposes, it’s advised to activate shared login at the start, so you are capable of testing your SAML configuration entirely. After you have set the SAML configuration and everything is running as expected, you can disable “Activate Shared Login” if you only wish to have users through SAML. If “Activate Shared Login” is disabled, the login page from CMNTY Platform will not be accessible anymore, unless you or someone from CMNTY Corporation enables it again.
Identity provider settings
Most of the configuration will take place on the side of the identity provider. You will have to configure the CMNTY Platform as a service provider within your identity provider.
You can use the following URLs for configuration.
ACS URL: https://yourplatform/saml/acs
Issuer URL: https://yourplatform/
Logout URL: https://yourplatform/saml/logout
Metadata URL: https://yourplatform/saml/metadata
Bindings
When returning the ACS response, CMNTY Platform will use the HTTP-POST binding.
When returning the SLO response, CMNTY Platform will use the HTTP-Redirect binding.
SAML Settings
The following settings are required by the identity provider to send along with the SAML requests.

Name ID (Required)
Setting a NameID is required. Make sure that this is a unique identifier at your place that does not change. This way, CMNTY Platform will be capable of identifying the correct user.
<saml:Subject>
<saml:NameID Format=”urn:oasis:names:tc:SAML:2.0:nameid-format:persistent”>
Your Unique Identifier
</saml:NameID>
</saml:Subject>
Email address Attribute (Required)
<saml:Attribute Name=”User.Email” NameFormat=”urn:oasis:names:tc:SAML:2.0:attrname-format:unspecified”>
<saml:AttributeValue xsi:type=”xs:string”>
emailaddress@domain.com
</saml:AttributeValue>
</saml:Attribute>
Username Attribute (Required)
<saml:Attribute Name=”User.Username” NameFormat=”urn:oasis:names:tc:SAML:2.0:attrname-format:unspecified”>
<saml:AttributeValue xsi:type=”xs:string”>
username
</saml:AttributeValue>
</saml:Attribute>
Role Attribute (Optional)
<saml:Attribute Name=”User.Role” NameFormat=”urn:oasis:names:tc:SAML:2.0:attrname-format:unspecified”>
<saml:AttributeValue xsi:type=”xs:string”>
member
</saml:AttributeValue>
</saml:Attribute>
The role attribute is optional. If no role is set, the user will be a member by default. Accepted values for the role attribute can be found in the platform, on the Role Overview page.
Other profile attributes (Optional)
CMNTY Platform contains a profile data mapper for SAML. You can send along any other attributes with your request. Within Admin, you can Configure which attribute maps to which profile field. Go to Profile mapping to add mapping under Integrations > SAML.

This is really useful if you want to send user profile data to the platform. Add the data key in the Identity Provider Field and select a Profile Field in the drop-down. Make sure that your identity provider sends the data key and it’s value along within the SAML response to CMNTY Platform.
Every Profile Field can be chosen, except for Descriptive Text type, as they have no value. Please make sure you don’t make any typos while filling in the data key otherwise no data will be saved. The system will recognize the data from your directory as text. So, if you are using profile fields like drop-down list, radio (one choice) or checkbox (multiple choice) the text should be the same as the answer options that you have created within the profile field. Our system is not strict about the use of capitals, so it is not a problem if you write ‘LEISURE’ or ‘leisure’, but it does not work if you write it differently or make a typo.
Mapping data does not override anything as it is done only the first time a user uses SAML as the login method. On subsequent logins, no user data will be read from the identity provider or written to CMNTY Platform.
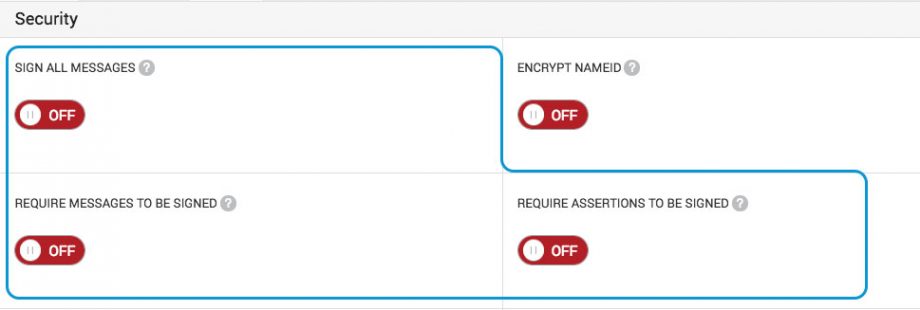
SAML Security Options
CMNTY Platform has multiple security options available. The security options consist of 2 different security mechanisms:
Signing
Signing allows for a verification mechanism to check that the contents of the SAML request/response have not been altered in transit. It’s highly recommended to turn on signing within your SAML set up.
CMNTY Platform has the following options present:
Signing all messages: All messages created by platform to the IDP are being automatically signed.
Require messages to be signed: All messages created by the IDP and transmitted to the platform should be signed. If the messages are not signed, you will not be able to continue logging in with SAML.
Require assertions to be signed: All assertions created by the IDP and transmitted to the platform should be signed. If the assertions are not signed, you will not be able to continue logging in with SAML.
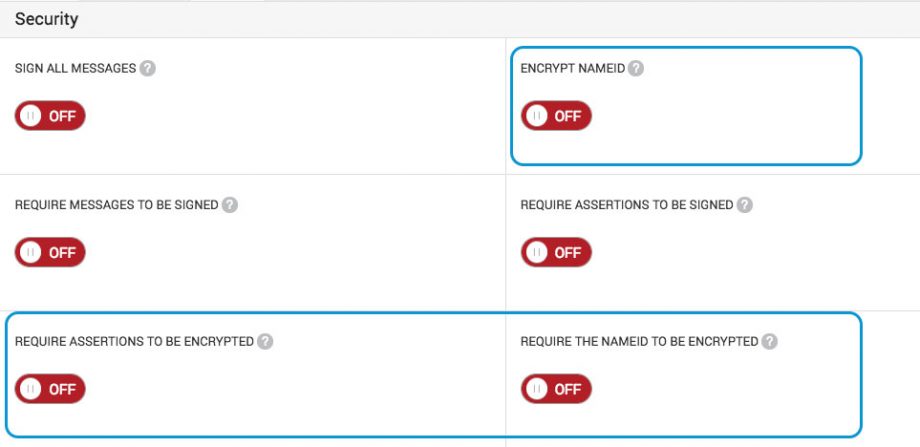
Encrypting
Encrypting allows for better protection of data that might be privacy related. If the SAML request/response contain private data, it’s recommended to encrypt your data.
CMNTY Platform has the following options present:
Encrypt NameID: The NameID will be send in an encrypted format by CMNTY Platform.
Require assertions to be encrypted: All assertions created by the IDP and transmitted to the platform should be encrypted. If the assertions are not encrypted, you will not be able to continue logging in with SAML.
Require the nameID to be encrypted: The nameID should be encrypted in all messages created by the IDP and transmitted to the platform. If the nameID is not encrypted, you will not be able to continue logging in with SAML.
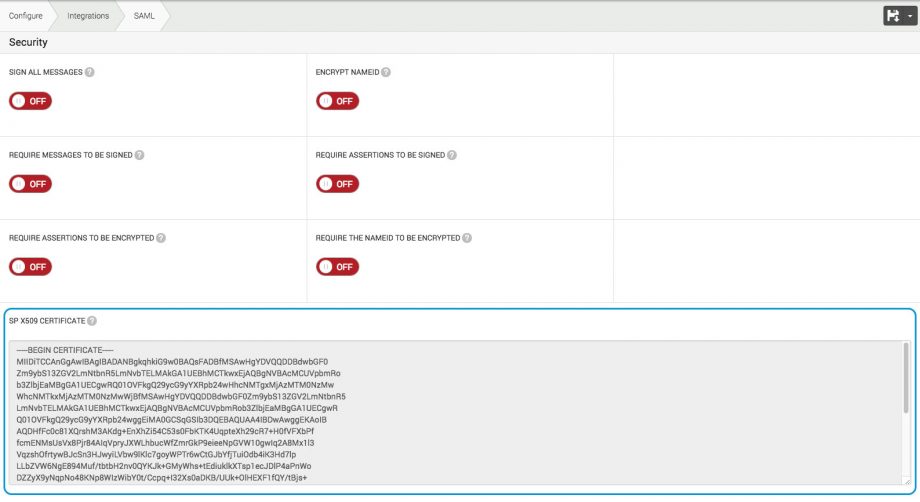
After saving your SAML configuration with one of the signing or encryption options turned on, an x509 certificate will be created by CMNTY Platform. You will find this certificate below the encryption switches and you should provide this to the IDP.
SAML Troubleshooting
When setting up SAML within your platform for the very first time, it is recommended to turn on “activate shared login” within the SAML configuration page. This allows you to still log in with your current account as well as logging in through SAML. By enabling this option, a SAML login button will appear on the login page.
When logging in through SAML, you will get a blue error page in case something goes wrong. CMNTY Platform will show an error message indicating what is wrong. Based on the error message, you will either need to change a setting within your Platform or within your IDP. For example, when the message ‘The SAML Message should be signed.’ appears, it means you enabled signing within CMNTY Platform and you should also turn it on within your IDP.
Related article: Setting up SSO with CMNTY Platform and G Suite.