
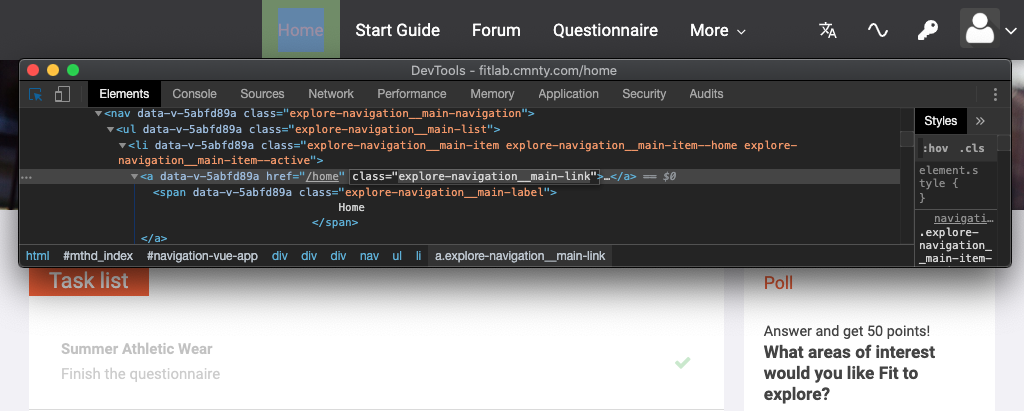
When using different user roles, it only takes a simple CSS code to remove a menu item for a specific role or all roles except a specific role. The main requirement to implement this feature is having multiple member roles to assign to users. Once those are set and applied to members, be sure to find the CSS for your menu item (i.e. .explore-navigation__main-link) to apply the segmentation code. If you cannot find the CSS for the menu item, use your inspect element to find the class for each item.
Assign Menu Items through CSS
- Go to Design at the top menu of Admin.
- Choose Stylesheet at the left menu.
- Add the code below to make the specified menu item only visible for that user role:
html:not(.role-member) .explore-navigation__main-link { display: none !important; } - Add the code below to make the specified menu item not visible for that user role:
.role-member .explore-navigation__main-link { display: none !important!; } - Save and review by using “log-in as” to make sure the change is occurring for members as intended.
Be sure to enter the key after role, i.e. “role-observer”.